Everything you need to know about adding assets, images, SVGs, and custom fonts in Flutter, from configuring pubspec.yaml to fixing common asset loading errors.
One of the first things you’ll want to do in a Flutter app is add images, icons, and custom fonts.
Maybe you’re building a login screen with a logo, a product page with photos, or a beautifully styled app with your favorite typography.
It sounds simple, but this is also where many beginners get stuck. You add an image to your project, run the app, and instead of seeing your logo, Flutter throws an error like this:
Unable to load asset...Or perhaps your custom font never appears, even though you’ve copied it into the project. Sometimes everything looks correct, but Flutter still can’t find your assets because of a small mistake in your pubspec.yaml file or an incorrect folder structure.
The good news is that once you understand how Flutter manages assets, adding images, fonts, icons, SVG files, and other resources becomes straightforward.
In this guide, you’ll learn how to organize your asset folders, register assets in pubspec.yaml, display images, add custom fonts, use SVG files, fix common loading errors, and understand why commands like flutter pub get are necessary.
By the end, you’ll know how to structure your Flutter projects the same way professional developers do.
- Everything you need to know about adding assets, images, SVGs, and custom fonts in Flutter, from configuring pubspec.yaml to fixing common asset loading errors.
- What Are Assets in Flutter?
- Recommended Flutter Asset Folder Structure
- Registering Assets in pubspec.yaml
- Displaying Images with Image.asset
- Image.asset vs Image.network
- Adding Custom Fonts in Flutter
- Using SVG Files and Icons in Flutter
- Common pubspec.yaml Indentation Mistakes
- Why Your Flutter Assets Aren't Loading
- What Does flutter pub get Actually Do?
- Wrapping Up
What Are Assets in Flutter?
In Flutter, an asset is any file that your application needs to use while it’s running.
These files aren’t written as Dart code. Instead, they’re bundled with your app and can be loaded whenever you need them.
Some common Flutter assets include:
- Images
- Custom fonts
- SVG files
- Icons
- JSON files
- Audio files
- Videos
- Lottie animations
- PDF documents
For example, if you’re building an e-commerce app, your project might contain:
- A company logo
- Product images
- Custom fonts for branding
- JSON files containing sample product data
- SVG icons for a crisp user interface
Flutter doesn’t automatically include these files in your app. Before you can use them, you must tell Flutter where they’re located by registering them in the pubspec.yaml file.
Once they’re registered, you can easily display images, apply custom fonts, load JSON data, play audio, or use any other asset throughout your application.
In the next section, we’ll organize our project by creating a clean asset folder structure that’s easy to maintain as your Flutter app grows.
Recommended Flutter Asset Folder Structure
As your Flutter project grows, keeping your assets organized becomes increasingly important. A clean folder structure makes it easier to find files, maintain your project, and collaborate with other developers.
A common mistake beginners make is placing every image, font, and icon directly inside a single assets folder. While this works for small projects, it quickly becomes difficult to manage as your app grows.
Instead, organize your Flutter assets into separate folders based on their purpose.
my_app/
│
├── assets/
│   ├── images/
│   │   ├── logo.png
│   │   ├── profile.png
│   │   └── products/
│   │
│   ├── icons/
│   │
│   ├── fonts/
│   │
│   ├── json/
│   │
│   ├── animations/
│   │
│   └── audio/
│
├── lib/
├── pubspec.yaml
└── test/
This structure keeps related files together, making your project much easier to navigate.
For example:
- Store logos, backgrounds, and photos inside
assets/images/. - Place custom icons inside
assets/icons/. - Save font files such as
.ttfor.otfinsideassets/fonts/. - Keep sample data in
assets/json/. - Store Lottie animations in
assets/animations/. - Put music and sound effects in
assets/audio/.
There’s no single “correct” folder structure in Flutter, but using a consistent organization like this will make your projects easier to maintain, especially as they grow from a few files to hundreds of assets.
In the next section, we’ll register these folders in the pubspec.yaml file so Flutter knows which assets to bundle with your application.
Registering Assets in pubspec.yaml
Creating an assets folder isn’t enough. Flutter won’t automatically include your images, fonts, or other resources when building your app.
Instead, you must register your Flutter assets in the pubspec.yaml file. This tells Flutter which files and folders should be bundled with your application.
Open the pubspec.yaml file located in the root of your project.
A typical Flutter project looks like this:
my_app/
│
├── assets/
├── lib/
├── test/
├── pubspec.yaml
└── README.md
Inside pubspec.yaml, locate the flutter: section.
To register an entire folder of images, add the following:
flutter:
  assets:
    - assets/images/
Code language: YAML (yaml)
Notice the indentation. Since YAML relies on spaces instead of brackets, every level must be aligned correctly. Even a single extra or missing space can prevent Flutter from loading your assets.
Once you’ve saved the file, run the following command:
flutter pub getCode language: JavaScript (javascript)This updates your project and tells Flutter to include the newly registered assets.
You can also register multiple folders:
flutter:
  assets:
    - assets/images/
    - assets/icons/
    - assets/json/
    - assets/animations/
Code language: YAML (yaml)
Registering folders instead of individual files keeps your project easier to maintain. Any new file you place inside these folders becomes available automatically, without needing to update your pubspec.yaml each time.
In the next section, we’ll use one of these registered assets to display an image using Flutter’s Image.asset widget.
Take Your Flutter Skills to the Next Level
Build professional Flutter apps through structured lessons, practical projects, and a complete capstone.
⭐ Trusted by 500+ Flutter developers.

Displaying Images with Image.asset
Now that you’ve registered your assets in pubspec.yaml, you can display them anywhere in your Flutter application using the Image.asset widget.
Suppose your project contains the following image:
assets/
└── images/
    └── flutter_logo.png
Since the assets/images/ folder is already registered, displaying the image is simple:
Image.asset(
  'assets/images/flutter_logo.png',
)
Code language: Dart (dart)
Run your application, and Flutter will load the image directly from your project’s assets.
Setting the Image Size
You can control the width and height of the image using the width and height properties.
Image.asset(
  'assets/images/flutter_logo.png',
  width: 150,
  height: 150,
)
Code language: Dart (dart)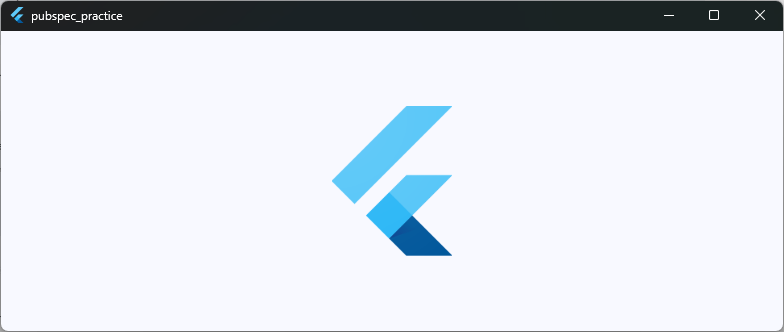
Controlling How an Image Fits
Sometimes the image doesn’t fit the available space the way you expect. The fit property controls how Flutter resizes the image inside its parent widget.
For example:
Image.asset(
  'assets/images/flutter_logo.png',
  width: 250,
  height: 180,
  fit: BoxFit.cover,
)
Code language: Dart (dart)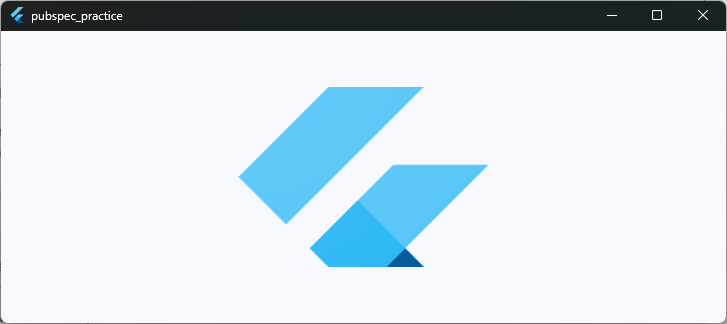
Some commonly used BoxFit values include:
BoxFit.coverfills the available space while maintaining the image’s aspect ratio. Parts of the image may be cropped.BoxFit.containdisplays the entire image without cropping, even if empty space remains.BoxFit.fillstretches the image to fill the available space, which may distort its proportions.BoxFit.fitWidthscales the image to match the available width.BoxFit.fitHeightscales the image to match the available height.
Choosing the right BoxFit depends on your design. For profile pictures and banners, cover is often a good choice. For logos and illustrations, contain usually produces better results.
Best Practices
When working with Flutter images, keep these tips in mind:
- Store images inside the
assets/images/folder. - Use descriptive file names such as
profile_avatar.pngorcompany_logo.png. - Optimize large images before adding them to your project to reduce your app’s size.
- Group related images into subfolders as your project grows.
The Image.asset widget is the most common way to display local images in Flutter, and you’ll use it in almost every application you build.
Image.asset vs Image.network
Flutter provides multiple ways to display images, but the two you’ll use most often are Image.asset and Image.network.
Although they look similar, they load images from completely different sources.
Image.asset
Use Image.asset when the image is stored inside your Flutter project.
For example, if your project contains:
assets/
└── images/
    └── profile.jpg
You can display it like this:
Image.asset(
  'assets/images/profile.jpg',
)
Code language: Dart (dart)
Since the image is bundled with your application, it works even when the device has no internet connection.
This makes Image.asset ideal for:
- App logos
- Icons
- Background images
- Illustrations
- Onboarding screens
- Local graphics
Image.network
Use Image.network when the image is hosted on the internet.
For example:
Image.network(
  'https://images.pexels.com/photos/36763592/pexels-photo-36763592.jpeg',
)
Code language: Dart (dart)
Flutter downloads the image from the provided URL when your application runs.
This is commonly used for:
- User profile pictures
- Product images
- Blog thumbnails
- Social media posts
- Images retrieved from APIs
Because these images are loaded over the internet, users must have a network connection. If the image fails to load, you should also consider displaying a placeholder or error widget to provide a better user experience.
Which One Should You Use?
Choose Image.asset for images that are part of your application and rarely change.
Choose Image.network for images that come from servers, databases, or web APIs and may change over time.
The following table summarizes the differences:
| Feature | Image.asset | Image.network |
|---|---|---|
| Image source | Local project | Internet |
| Internet required | ❌ No | ✅ Yes |
| Faster loading | ✅ Yes | Depends on the network |
Requires pubspec.yaml | ✅ Yes | ❌ No |
| Best for | Logos, icons, illustrations | User photos, products, API images |
Both widgets are used extensively in Flutter applications, and knowing when to use each one will help you build faster, more reliable, and more responsive user interfaces.
Adding Custom Fonts in Flutter
Using a custom font is a great way to give your Flutter application a unique look and feel. Whether you’re building a personal project or a production app, custom typography can make your user interface more polished and consistent.
Flutter makes it easy to use custom fonts, but before you can apply them, you need to register them in your pubspec.yaml file.
Step 1: Add Your Font Files
Create a fonts folder inside your assets directory and copy your font files into it. Let’s make use of the Poppins fonts.
https://fonts.google.com/specimen/Poppins
For example:
assets/
└── fonts/
    ├── Poppins-Regular.ttf
    ├── Poppins-Medium.ttf
    ├── Poppins-SemiBold.ttf
    └── Poppins-Bold.ttf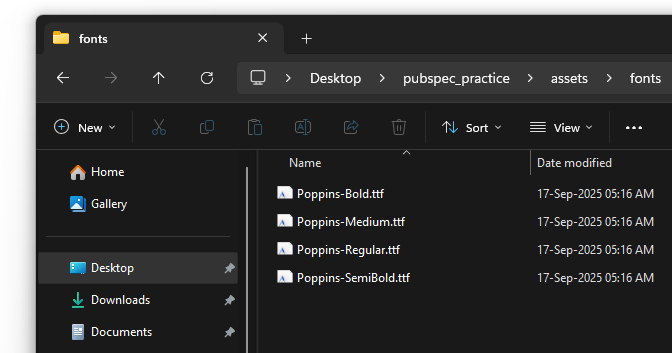
Step 2: Register the Fonts
Open your pubspec.yaml file and add the following configuration:
flutter:
  fonts:
    - family: Poppins
      fonts:
        - asset: assets/fonts/Poppins-Regular.ttf
        - asset: assets/fonts/Poppins-Medium.ttf
          weight: 500
        - asset: assets/fonts/Poppins-SemiBold.ttf
          weight: 600
        - asset: assets/fonts/Poppins-Bold.ttf
          weight: 700
Code language: YAML (yaml)
Here, family defines the font family name you’ll use in your Dart code, while each asset points to a font file. The optional weight property tells Flutter which file to use for different font weights.
Step 3: Run flutter pub get
After saving your changes, run:
flutter pub getCode language: JavaScript (javascript)This updates your project and makes the registered fonts available to your application.
Step 4: Use the Font
Once registered, you can apply the font using the fontFamily property.
Text(
  'Welcome to Flutter!',
  style: TextStyle(
    fontFamily: 'Poppins',
    fontSize: 24,
    fontWeight: FontWeight.w700,
  ),
)
Code language: Dart (dart)
Flutter automatically selects the correct font file based on the fontWeight you specify. In this example, it uses Poppins-Bold.ttf because it was registered with a weight of 700.
Best Practices
When working with Flutter custom fonts, keep these recommendations in mind:
- Store all font files inside
assets/fonts/. - Register every font weight you plan to use.
- Use a single font family name consistently throughout your app.
- Prefer modern
.ttfor.otffont files from trusted sources. - Avoid adding unnecessary font files to keep your app size smaller.
Using properly registered custom fonts helps create a consistent visual identity and gives your Flutter applications a more professional appearance.
Applying a Custom Font to Your Entire App
If your application uses the same font throughout the user interface, you don’t need to specify the fontFamily for every Text widget.
Instead, you can set the default font in your app’s ThemeData. This is the approach used in most production Flutter applications because it keeps your code cleaner and ensures a consistent look across every screen.
Simply set the fontFamily property when creating your app’s theme:
return MaterialApp(
  title: 'Pubspec Practice',
  debugShowCheckedModeBanner: false,
  theme: ThemeData(
    useMaterial3: true,
    colorSchemeSeed: Colors.blue,
    brightness: Brightness.light,
    fontFamily: 'Poppins',
  ),
  home: const HomeScreen(),
);
Code language: Dart (dart)
Now, every Text widget automatically uses the Poppins font unless you explicitly choose a different one.
For example:
Text(
  'Welcome to FlutterSensei!',
  style: TextStyle(
    fontSize: 24,
    fontWeight: FontWeight.bold,
  ),
)
Code language: Dart (dart)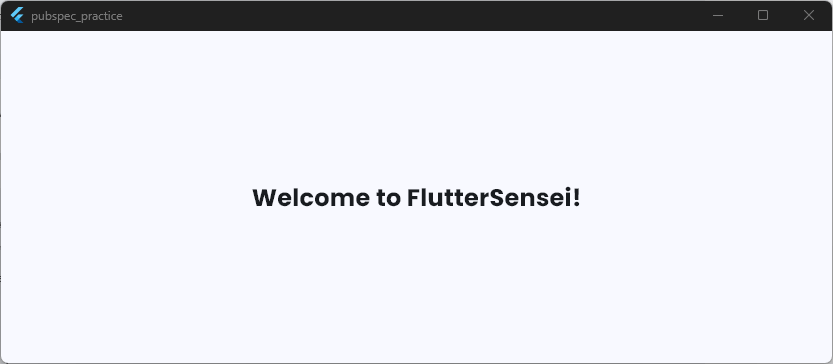
Even though the fontFamily isn’t specified here, Flutter still displays the text using Poppins because it’s defined in the application’s theme.
You can still override the default font whenever needed by specifying a different fontFamily in an individual TextStyle.
Using ThemeData for your Flutter custom fonts keeps your code easier to maintain and provides a consistent typography system throughout your application.
Tip: If you’re starting a new Flutter project, configure your app’s theme before building your UI. This ensures every screen uses the same typography from the beginning and avoids updating individual
Textwidgets later.
Using SVG Files and Icons in Flutter
Images such as PNG and JPG work well for photographs and illustrations, but they’re not always the best choice for icons and logos.
That’s where SVG (Scalable Vector Graphics) files come in.
Unlike traditional images, SVGs are vector graphics. This means they can be resized to any dimension without becoming blurry or pixelated, making them perfect for modern user interfaces.
Common uses for Flutter SVG files include:
- Company logos
- Navigation icons
- Illustrations
- Diagrams
- User interface graphics
Step 1: Install the flutter_svg Package
Flutter doesn’t support SVG files out of the box, so you’ll need to install the flutter_svg package.
Add it to your pubspec.yaml file:
dependencies:
  flutter_svg: ^2.3.0
Code language: YAML (yaml)
Then run:
flutter pub getCode language: JavaScript (javascript)Step 2: Add Your SVG Files
Store your SVG files inside your assets folder.
For example:
assets/
└── icons/
    ├── flutter_logo.svg
    ├── dashboard.svg
    └── settings.svg
If you haven’t already, register the folder in your pubspec.yaml file:
flutter:
  assets:
    - assets/icons/
Code language: YAML (yaml)
Step 3: Display the SVG
Import the package:
import 'package:flutter/material.dart';
import 'package:flutter_svg/flutter_svg.dart';
Code language: Dart (dart)
Then display the SVG using SvgPicture.asset.
body: Padding(
  padding: const EdgeInsets.all(16),
  child: Center(
    child: Row(
      children: [
        Expanded(
          child: SvgPicture.asset(
            'assets/icons/flutter_logo.svg',
            width: 150,
            height: 150,
          ),
        ),
        Expanded(
          child: SvgPicture.asset(
            'assets/icons/dashboard.svg',
            width: 150,
            height: 150,
          ),
        ),
        Expanded(
          child: SvgPicture.asset(
            'assets/icons/settings.svg',
            width: 150,
            height: 150,
          ),
        ),
      ],
    ),
  ),
),
Code language: Dart (dart)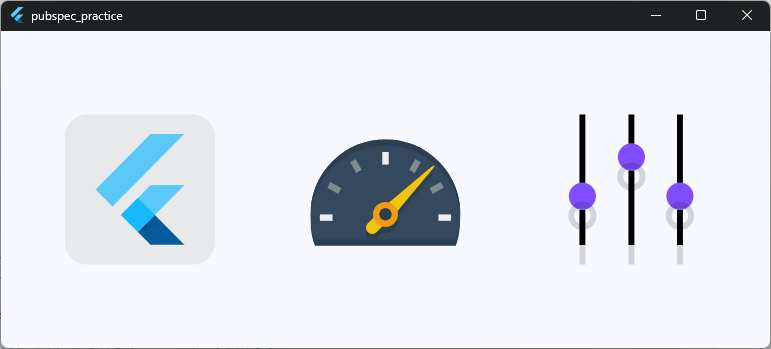
Just like Image.asset, Flutter loads the SVG from your project’s assets.
When Should You Use SVG Instead of PNG?
Choose SVG when you need graphics that remain sharp at any size.
Examples include:
- App logos
- Toolbar icons
- Bottom navigation icons
- Dashboard illustrations
- Simple graphics
Choose PNG or JPG for:
- Photographs
- Product images
- Wallpapers
- Complex artwork with thousands of colors
Using Flutter Icons
Flutter also includes hundreds of built-in Material Icons, so you don’t always need image files.
For example:
const Icon(
  Icons.favorite,
  size: 48,
  color: Colors.red,
)
Code language: Dart (dart)
These icons are lightweight, customizable, and integrate seamlessly with Flutter’s Material Design components.
SVG vs Flutter Icons
Both SVG files and Flutter’s built-in icons have their place.
| Feature | SVG | Flutter Icons |
|---|---|---|
| Custom logos | ✅ | ❌ |
| Brand illustrations | ✅ | ❌ |
| Material Design icons | ❌ | ✅ |
| Resize without quality loss | ✅ | ✅ |
| Change color easily | ✅ | ✅ |
If you’re creating a production Flutter application, you’ll often use both. Built-in icons are ideal for standard interface elements, while SVG files are perfect for custom branding and illustrations.
Why is my SVG showing as black?
Some SVG files exported from design tools like Adobe Illustrator contain unsupported features such as embedded images, complex CSS, masks, or filters. If your SVG appears completely black or doesn’t render correctly, try exporting it as a Plain SVG or Optimized SVG, or use a simpler SVG that consists primarily of vector paths.
Common pubspec.yaml Indentation Mistakes
If Flutter can’t find your assets or fonts, the problem is often not the image itself. It’s a small formatting mistake inside your pubspec.yaml file.
Unlike many programming languages, YAML uses spaces to define structure. Even a single missing space or an incorrect indentation level can prevent Flutter from recognizing your assets.
Let’s look at some of the most common mistakes.
Mistake 1: Incorrect Indentation
A common mistake is placing assets: at the wrong indentation level.
❌ Incorrect
flutter:
assets:
  - assets/images/
Code language: YAML (yaml)
✅ Correct
flutter:
  assets:
    - assets/images/
Code language: YAML (yaml)
Notice that assets: is indented under the flutter: section, and each asset path is indented beneath assets:.
Mistake 2: Using Tabs Instead of Spaces
YAML does not allow tab characters for indentation.
If you accidentally press the Tab key instead of using spaces, Flutter may report parsing errors or ignore your configuration.
Always use spaces when editing your pubspec.yaml file. Most code editors, including VS Code and Android Studio, automatically insert spaces for YAML files.
Mistake 3: Missing the Dash (-)
Each asset entry must begin with a dash (-).
❌ Incorrect
flutter:
  assets:
    assets/images/
Code language: YAML (yaml)
✅ Correct
flutter:
  assets:
    - assets/images/
Code language: YAML (yaml)
Without the dash, Flutter doesn’t recognize the entry as part of the asset list.
Mistake 4: Registering the Wrong Folder
Make sure the folder name in pubspec.yaml exactly matches your project’s folder structure.
For example, if your project contains:
assets/
└── images/
Your configuration should be:
flutter:
  assets:
    - assets/images/
Code language: YAML (yaml)
Even small differences in folder names, capitalization, or spelling can cause Flutter to report:
Unable to load asset...Mistake 5: Incorrect Font Registration
Fonts must be registered under the fonts: section, not under assets:.
❌ Incorrect
flutter:
  assets:
    - assets/fonts/Poppins-Regular.ttf
Code language: YAML (yaml)
✅ Correct
flutter:
  fonts:
    - family: Poppins
      fonts:
        - asset: assets/fonts/Poppins-Regular.ttf
Code language: YAML (yaml)
Registering font files as regular assets won’t make them available through the fontFamily property.
Mistake 6: Forgetting to Save the File
This one is surprisingly common.
After updating your pubspec.yaml, remember to save the file before running:
flutter pub getCode language: JavaScript (javascript)If the file isn’t saved, Flutter continues using the previous configuration.
Best Practices
To avoid indentation problems:
- Use spaces instead of tabs.
- Keep your indentation consistent.
- Double-check folder names and file paths.
- Save
pubspec.yamlbefore runningflutter pub get. - Let your code editor format the file whenever possible.
Most asset-loading problems can be traced back to one of these small mistakes. Taking a minute to review your pubspec.yaml carefully can save you a lot of debugging time.
Why Your Flutter Assets Aren’t Loading
If Flutter displays an error such as:
Unable to load asset...don’t panic. In most cases, the problem is caused by a small configuration mistake rather than the asset itself. Here are the most common reasons why Flutter assets fail to load.
1. The Asset Isn’t Registered
Before Flutter can use an image, font, or other resource, it must be registered in your pubspec.yaml file.
For example:
flutter:
  assets:
    - assets/images/
Code language: YAML (yaml)
If the folder or file isn’t registered, Flutter won’t include it when building your application.
2. The File Path Is Incorrect
The path you use in your Dart code must exactly match the file’s location.
For example, if your project contains:
assets/
└── images/
    └── logo.png
The correct code is:
Image.asset(
  'assets/images/logo.png',
)
Code language: Dart (dart)
Even a small typo can cause Flutter to report that the asset couldn’t be found.
3. The File Name Doesn’t Match
Flutter file paths are case-sensitive. These are considered different files:
logo.png
Logo.png
LOGO.png
Code language: Dart (dart)
Always check the capitalization, spelling, and file extension carefully.
4. You Forgot to Run flutter pub get
After adding or registering new assets, remember to run:
flutter pub getCode language: JavaScript (javascript)This updates your project and tells Flutter to include the new assets.
5. The App Needs a Restart
Sometimes a simple Hot Reload isn’t enough after adding new assets.
If your image still doesn’t appear, try:
- Hot Restart
- Stop the application completely
- Run the project again
Flutter may need to rebuild the asset bundle before the new files become available.
6. The Asset Is Outside the Registered Folder
Suppose your pubspec.yaml contains:
flutter:
  assets:
    - assets/images/
Code language: YAML (yaml)
This works:
assets/images/logo.png
Code language: Dart (dart)
But this does not:
assets/logo.png
Code language: Dart (dart)
Make sure every asset is stored inside one of the registered folders.
7. The Asset Doesn’t Exist
Sometimes the simplest explanation is the correct one.
Double-check that:
- The file hasn’t been renamed.
- The file hasn’t been deleted.
- You’re using the correct file extension.
- The file is inside your project.
Quick Troubleshooting Checklist
If an asset won’t load, check the following:
- Is the asset registered in
pubspec.yaml? - Is the file path correct?
- Does the file name match exactly?
- Did you save the
pubspec.yamlfile? - Did you run
flutter pub get? - Did you restart the application?
- Is the asset inside a registered folder?
Most Flutter asset loading problems can be solved by working through this checklist one step at a time. Taking a few minutes to verify each item is often much faster than searching for the error online.
What Does flutter pub get Actually Do?
If you’ve followed a Flutter tutorial before, you’ve probably seen the command:
flutter pub getCode language: JavaScript (javascript)Many beginners run it because they’re told to, but they don’t always know what it actually does. Understanding this command will help you troubleshoot asset-loading issues and manage your project more confidently.
How Flutter Uses pubspec.yaml
The pubspec.yaml file acts as your project’s configuration file. It tells Flutter which packages your project depends on and which local assets, fonts, and other resources should be included when your app is built.
Whenever you add a new image, register a font, or install a package, you’re changing the information stored in pubspec.yaml. However, simply saving the file doesn’t automatically update your Flutter project.
What Happens When You Run flutter pub get?
When you run:
flutter pub getCode language: JavaScript (javascript)Flutter reads the latest version of your pubspec.yaml file and updates your project accordingly. It downloads any new packages you’ve added, refreshes the dependency information, and registers any newly configured assets and fonts.
Without this step, Flutter continues using the previous project configuration. That’s why you might see errors like “Unable to load asset”, even though the file exists and the path is correct.
When Should You Run It?
You should run flutter pub get whenever you make changes to your pubspec.yaml file.
Some common situations include:
- Adding a new package from pub.dev
- Registering image assets
- Registering custom fonts
- Updating package versions
- Editing dependency or asset configurations
If you only modify your Dart code or replace an existing image without changing pubspec.yaml, you usually don’t need to run the command again.
A Few Helpful Tips
Before running flutter pub get, make sure you’ve saved your pubspec.yaml file. Otherwise, Flutter will continue using the previous version of the configuration.
If your assets still don’t appear after running the command, try performing a Hot Restart or restarting the application completely. In some cases, Flutter needs to rebuild the asset bundle before newly registered assets become available.
Understanding what flutter pub get does makes it much easier to diagnose project setup issues.
Instead of running the command out of habit, you’ll know exactly when it’s needed and why it solves so many common Flutter problems.
Wrapping Up
Adding assets, images, and custom fonts is one of the first skills every Flutter developer learns.
While the process is straightforward, small mistakes such as incorrect file paths, indentation errors in pubspec.yaml, or forgetting to run flutter pub get can quickly become frustrating if you don’t know what to look for.
In this guide, you learned how Flutter manages project assets, how to organize your files using a clean folder structure, and how to register images and fonts correctly.
You also discovered the differences between Image.asset() and Image.network(), how to use SVG files, and how to troubleshoot the most common asset-loading problems.
Once you’re comfortable working with assets, you’ll be able to build interfaces that look more polished and professional.
Images, icons, custom typography, animations, and illustrations all play an important role in creating apps that users enjoy using.
The best way to reinforce what you’ve learned is to practice. Create a small Flutter project, add a few images, experiment with custom fonts, and organize your assets into folders.
The more you work with them, the more natural the workflow will become.
In the next FlutterSensei guide, we’ll explore another essential Flutter topic and continue building your Flutter skills one step at a time.
Ready to Build Professional Flutter Apps?
Turn today’s knowledge into real-world Flutter skills with Flutter Foundations.
⭐ Trusted by 500+ Flutter developers.