The “Spaghetti Code” Ceiling: Why Most Flutter Beginners Quit
You’ve finally done it. You’ve mastered the basic widgets, your UI looks decent, and your app actually runs. But then, you decide to add a fifth screen. Suddenly, the excitement vanishes.
You open your project, and it’s a nightmare. Your main.dart file is 1,500 lines long. You’re scrolling frantically just to find a single onPressed function. You change a button’s color on one page, and for some reason, the logic breaks on another.
This is the “Spaghetti Code” Ceiling. It’s the invisible wall where 90% of beginners stop building. When your project structure is a mess, every new feature feels like adding a brick to a house made of cards. Eventually, it all collapses, and you abandon the project out of sheer frustration.
The Symptom: The “Treasure Hunt” Debugging
If your development process feels like a treasure hunt every time you need to fix a bug, you don’t have a “coding” problem—you have an architecture problem.
- Is your business logic mixed in with your UI code?
- Are you copy-pasting the same Button widget across four different files?
- Do you have a
libfolder that is just a flat list of 20 files with no organization?
Professional developers don’t work this way. They can’t afford to.
The Solution: The Sensei Folder Blueprint
High-end Android teams and senior Flutter architects use a specific “Blueprint” to keep their sanity. They don’t just “write code”; they organize intent.
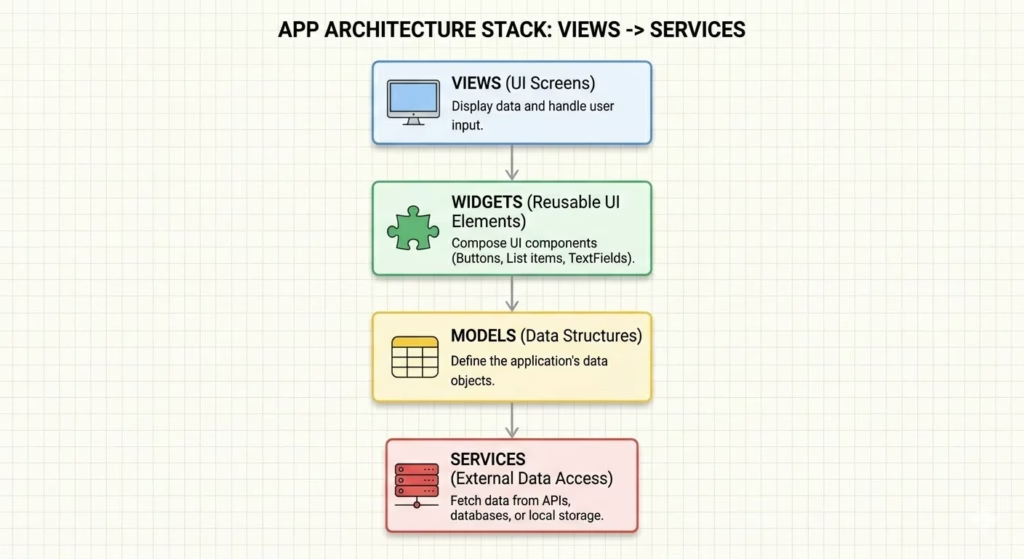
By separating your app into logical layers—Data, UI, and Business Logic—you turn your project from a tangled mess into a modular machine. Whether you are building a simple Note app or a complex E-commerce platform, the structure remains the same.
In this guide, I’m pulling back the curtain on the Sensei Folder Blueprint. This is the exact organizational standard I use for every project in the Level 1 Bundle, ensuring that your code remains clean, scalable, and—most importantly—profitable.
Want to Build Flutter Apps the Right Way?
Get the free Build Your First Android App video class and learn the foundations that every Flutter developer should know.
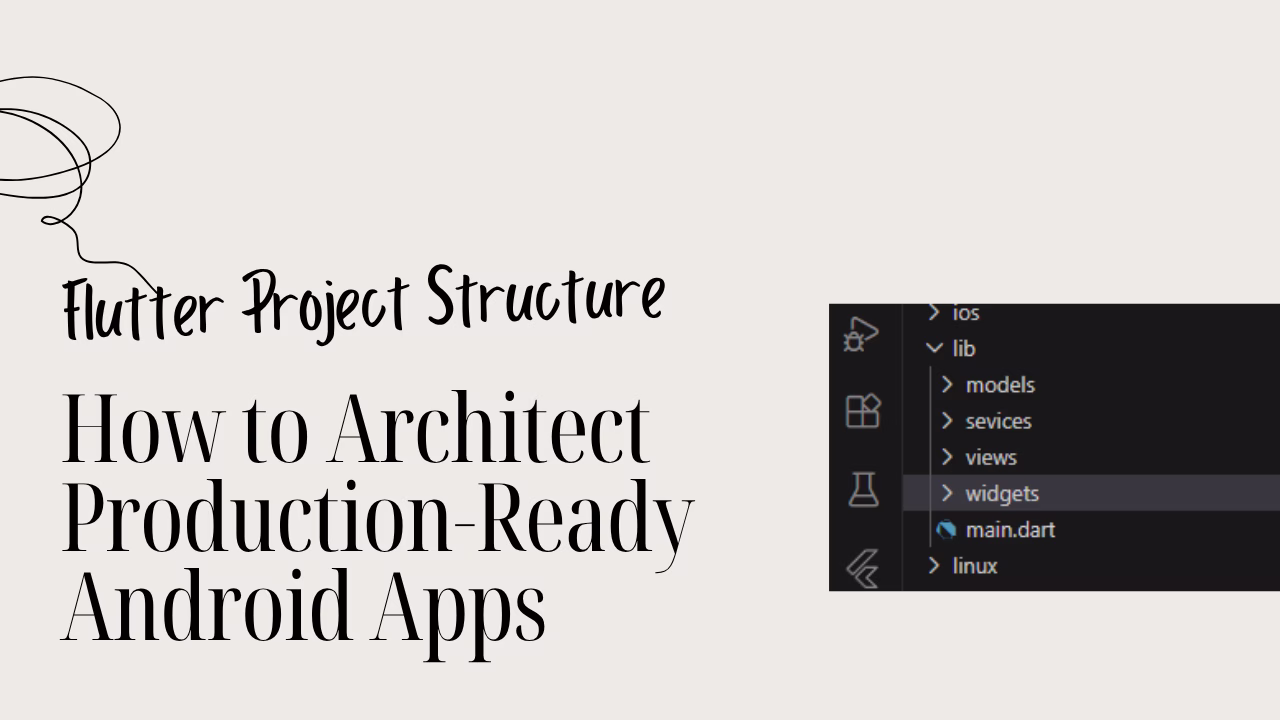
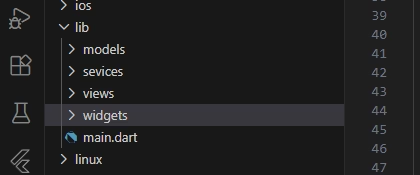
The Core Anatomy: Breaking Down the lib/ Folder
In a professional Flutter environment, your lib/ folder shouldn’t just be a graveyard of .dart files. It should be a mapped-out territory. By categorizing your code into these four essential layers, you ensure that your app remains predictable and easy to debug.
The models/ Layer: The “Brain”
Before you build a single button, you must define what your data looks like.
- What goes here: Plain Dart classes that represent your objects (e.g.,
User,Task, orProduct). - The Sensei Secret: This layer has zero Flutter code. No
Colors, noContainers. It is pure logic that tells your app how to handle information. - Why it matters: When you decide to change how a “Task” is structured, you change it in one file, and the rest of your app follows suit.
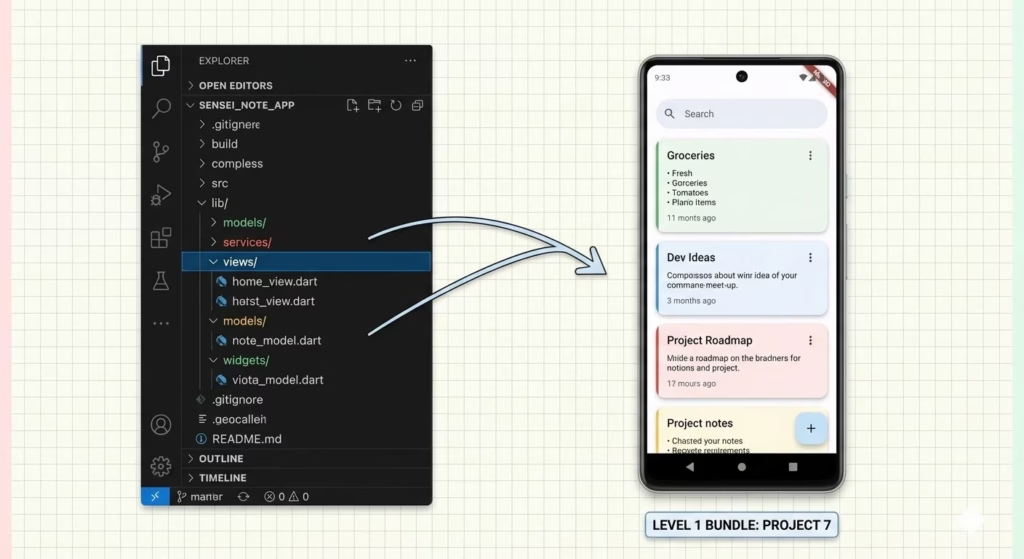
The views/ (or screens/) Layer: The “Face”
This is where your high-level layouts live. Think of a View as a full page—your Home Screen, your Profile Page, or your Settings menu.
- What goes here: Stateful or Stateless widgets that occupy the entire screen.
- The Sensei Secret: Keep your Views “dumb.” They should display data and trigger functions, but they shouldn’t contain heavy business logic or complex calculations.
- Why it matters: It makes your UI code much shorter and easier to read.
The widgets/ Layer: Reusable Components
Stop the “Copy-Paste” cycle. If you use a specific styled button or a custom card more than once, it belongs in the widgets/ folder.
- What goes here: Small, reusable UI pieces like
custom_button.dart,task_tile.dart, orapp_logo.dart. - The Sensei Secret: Building a robust
widgets/library is like building your own private UI kit. - Why it matters: It slashes your development time. Need to change the theme of every button in your app? You only have to edit one file in the
widgets/folder.
The services/ (or data/) Layer: The “Engine Room”
This is where the heavy lifting happens. This layer communicates with the outside world or the device’s internal storage.
- What goes here: API clients, Firebase helpers, or Hive local storage logic.
- The Sensei Secret: Your UI should never “know” how a file is saved; it should just ask the Service to do it.
- Why it matters: If you decide to switch from Hive to SQLite later, you only change the code in this folder. Your UI doesn’t even notice the difference.
The Naming Convention Strategy: Speaking the Language of Pros
You might think, “It’s my code, I can name it whatever I want.” While that’s technically true, following industry standards is what makes your code readable to other developers, recruiters, and even your future self.
If you want to sell your source code on platforms like Gumroad, your buyers expect a professional standard. Here is the “Sensei” guide to naming.
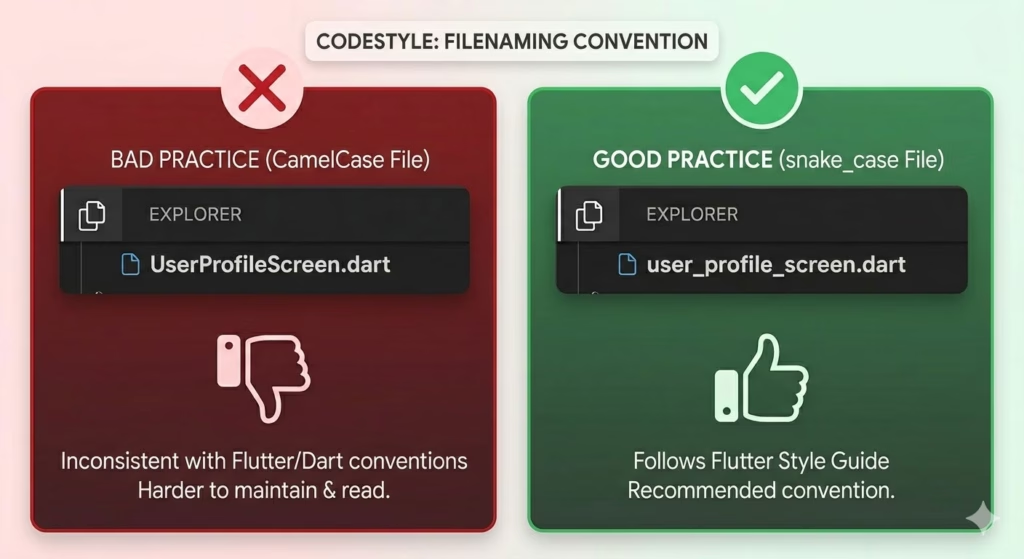
Why snake_case Matters for Files
In Flutter and Dart, every file name must be in snake_case (all lowercase with underscores).
- The Rule:
user_profile_screen.dart, notUserProfileScreen.dart. - The Reason: Operating systems handle capital letters differently. To avoid “File Not Found” errors when moving code between Windows, Mac, and Linux, the Dart team standardized lowercase filenames.
- The Sensei Secret: Always match the filename to the main class inside it. If your class is
CustomButton, your file should becustom_button.dart.
Why PascalCase Matters for Classes
While files are lowercase, your Classes and Widgets must be in PascalCase (Every word starts with a Capital).
- The Rule:
class TaskCard extends StatelessWidget { ... } - The Reason: This makes it instantly clear to anyone reading your code what is a Type (a Class) and what is a Variable or Function (which use
camelCase).
The “Single Responsibility” Rule: One File, One Job
This is the Golden Rule of the Sensei Blueprint.
- The Problem: Beginners often cram five different widgets and three helper functions into one
.dartfile. - The Solution: Every file should have a single purpose. If you have a
UserAvatarwidget, it deserves its own file in thewidgets/folder. If you have aValidationService, it stays in theservices/folder. - The Result: When something breaks, you know exactly which file to open. No more “Treasure Hunts” through 2,000 lines of code.
Why Structure is a “Career Skill” (The Professional Edge)
Many developers think that “if the app runs, the job is done.” In the world of professional software engineering, that couldn’t be further from the truth.
Coding is only 40% of the job—the other 60% is maintenance and communication. If you want to move from “tinkering” to “earning,” you have to treat your project structure as a high-value skill.
The “GitHub Audit”: What Recruiters See First
When a hiring manager or a client clicks on your GitHub repository, they don’t start by reading your logic. They look at your folder tree.
- The “Junior” Red Flag: A
lib/folder that is a flat list of 30 messy files. It tells them you’ll be a nightmare to work with on a team. - The “Senior” Green Flag: A clean hierarchy of
models,views, andservices. It tells them you understand scalability. - The Sensei Secret: A well-structured project is a silent resume. It proves you have discipline before they even see your first
Widget.
The “Gumroad-Ready” Difference
There is a massive difference between a “Weekend Hobby” project and a Digital Asset.
- Hobby Projects: Are built to work once. If someone else tries to read the code, they get lost. These have zero resale value.
- Gumroad-Ready Assets: Are built to be sold. When a customer buys a template or a source code bundle from you, they are paying for your organization. They want code they can easily customize, extend, and understand.
- The Result: If your structure is a mess, you can’t sell your code. Professional architecture is the difference between a project that sits on your hard drive and a product that generates passive income.
Summary: Your First Professional Blueprint
The journey to becoming a Senior Flutter Developer doesn’t start with complex AI or 3D graphics—it starts with a clean lib/ folder.
- Audit your current project today.
- Separate your logic from your UI.
- Rename those files.
- Stop the “Spaghetti Code” before it stops you.
Once you experience the psychological relief of a perfectly organized project, you’ll never go back to the “Messy Method” again.
Ready to Move Beyond Tutorials?
Learn how to build maintainable, production-ready Flutter apps with practical projects and real-world guidance.
Get free access to the Build Your First Android App video class.