Create your first Flutter app from scratch while learning widgets, layouts, state management, and the Flutter development workflow step by step.
Ever wanted to build your own Android App? I did. And when I started researching back in 2012, I realized I had to learn Java, C++, and all this heavy stuff just to get started. It was a massive headache.
But it’s 2026 now, and you don’t need any of that.
All you need to learn is Flutter. That’s it. No Java, No C++, No Kotlin.
The best part? This one codebase runs everywhere. Thanks to Google, you can now build performance-ready apps in hours. That’s right—not days, not months, but hours.
You can use Flutter to build not just Android apps, but iOS, Windows, and Web apps too. Basically, you build one app, and it runs everywhere. Awesome, right?
That’s exactly what we’re doing in this tutorial. We’re going to build your first Android app with Flutter from scratch. It’s a simple one to get your feet wet, and trust me, you’re going to love it.
- Flutter Installation
- Step 1: Create a Flutter Project
- Step 2: The main.dart File
- Step 3: The import Statement
- Step 4: The main Function
- Step 5: The runApp()
- Step 6: The MyApp Widget
- Step 7: Creating the StatelessWidget
- Step 8: The build Method
- Step 9: The Contents of the MaterialApp
- Step 10: Setting the Theme with ThemeData
- Step 11: The home Property
- Step 12: The StatefulWidget
- Step 13: The Private _HomeScreenState
- Step 14: The AppBar Widget
- Step 15: The Body of the App
- Step 16: The Alignment
- Step 17: Styling the Text() Widget
- Step 18: The ElevatedButton() and SizedBox
- Step 19: The Logic (The App's Brain)
- Step 20: Applying the Logic
- Step 21: Changing the App Theme
- The Grand Finale
- Take Your Flutter Skills to the Next Level
- Ready to Build Professional Flutter Apps?
Flutter Installation
Now, to get started, you need to have Flutter installed. I’ve written a separate blog post where I show you exactly how to install Flutter the right way—and how to test it to make sure you’re ready to go.
Step-by-Step Flutter Installation Guide
Step 1: Create a Flutter Project
Alright, the installation guide showed you the basics of creating a project, but here I’m going to give you the real step-by-step. And I mean step-by-step. Nothing gets skipped, and there’s no long theory.
Let’s jump into Step 1.
First, open your terminal. We need to navigate to the Desktop (or wherever you want to keep your projects).
cd DesktopI’m using the Desktop to keep things simple, but feel free to choose any location you want. Now, let’s create a new folder specifically for your Flutter work:
mkdir flutter_appsNow that we have the folder ready, let’s go inside it:
cd flutter_appsAlright, here is the big moment. Let’s create the actual project. Type this in and hit enter:
flutter create hello_world_toggleThis command tells Flutter to generate all the files and folders you need for a working app. Once it’s finished, move into your new project folder:
cd hello_world_toggleNow, assuming you have VS Code installed, you can launch the project immediately by typing:
code .(Note: If “code .” doesn’t work for you, just open VS Code manually and go to File > Open Folder and select the hello_world_toggle folder.)
Once it opens, your workspace should look like this:

Step 2: The main.dart File
Right now, you’re looking at the VS Code window. On the left, you’ll see a bunch of files and folders—that’s the entire skeleton of your Flutter app.
But here’s the secret: you don’t need to master everything. In fact, out of all those files, you only need to focus on one folder called lib. That is where your entire app actually lives.
Go ahead and open that lib folder. Inside, you’ll see a file called main.dart.
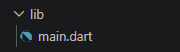
That’s your “App file.” That single file is what makes the entire Android app run.
By default, Flutter puts a “counter app” in there so you have something to look at. But we want to build our own thing from scratch. So, go ahead and delete everything inside main.dart. Make it a completely blank file.
Step 3: The import Statement
Now that our main.dart file is empty, it’s time to write some code. I know that feeling—your anxiety starts kicking in, thinking, “What’s about to happen?”
Mine did too when I started, but don’t worry. It’s actually pretty simple.
Let’s write the first line, and I’ll explain what it means:
import 'package:flutter/material.dart';
Code language: JavaScript (javascript)
Alright, the first line is an import statement. But what are we actually importing?
Flutter already has almost everything we need inside a “box” called material.dart. By writing this line, we just grabbed that box.
Think of this as a big box of Lego pieces. If you want to build something, you take the pieces you need and snap them together, right? That’s exactly how Flutter works.
In this world, each Lego piece is called a Widget, and we build the entire app by putting widgets together.
Step 4: The main Function
We’ve imported our library; now we need to call the function that actually starts the engine.
void main() {
  runApp(const MyApp());
}
Code language: JavaScript (javascript)
This function is the heart of your entire Android app. If this function isn’t there, your app will never run.
Now, you see that word void? You’ve probably heard the phrase, “I stared into the void.” In programming, void means exactly that: nothing.
We use it here to tell the computer that when the main() function runs, it’s just going to do its job and isn’t going to “return” or give back any extra data. It just starts the app.
Step 5: The runApp()
Inside the main() function, we added runApp(). It does exactly what it says: it runs the app. But notice that inside the parentheses, we wrote const MyApp().
Right now, your code might show a red underline under MyApp. That’s because MyApp doesn’t exist yet! We have to build it ourselves.
As for that const keyword? It stands for constant. In Flutter, we use it to tell the app, “This part isn’t going to change while the app is running.”
It helps the app run faster and smoother because Flutter doesn’t have to rebuild that piece from scratch every time.
Step 6: The MyApp Widget
Now, the MyApp we just mentioned? We are going to build it as a Widget. Remember our Lego analogy? We are essentially creating our own custom Lego piece.
In Flutter, there are two main types of widgets you’ll use:
- Stateless Widget
- Stateful Widget
So, what’s the difference? To be honest, they mean exactly what they sound like.
- Stateless Widget: This is a “static” widget. It doesn’t do anything fancy like changing text on the fly or animating objects. It just sits there and looks the way you told it to look.
- Stateful Widget: I bet you already guessed it. This one is dynamic. It handles all the animations, user inputs, and changing data.
Now, here is the big question: Should we make MyApp a Stateful or a Stateless widget?
The answer is: Stateless.
I know, I know—you were probably thinking Stateful because we want our app to do cool things! But hear me out: We make the main MyApp wrapper stateless because it’s just the “shell” of our app.
It stays the same, but it holds the Stateful widgets inside it. Think of it like a sturdy Lego baseplate that holds all the moving parts.
Step 7: Creating the StatelessWidget
Alright, let’s actually build the StatelessWidget for our MyApp. Right below your main() function, add this line:
class MyApp extends StatelessWidget {}
Code language: JavaScript (javascript)
See that extends keyword? It basically means that the StatelessWidget class already exists inside that Lego box (Material library) we imported earlier.
We are simply “borrowing” all its powers and giving them to our own class called MyApp.
Now, let’s fill it in:
class MyApp extends StatelessWidget {
  const MyApp({super.key});
}
Code language: JavaScript (javascript)
Okay, we added const—we already know that means “this stays the same.” But then we wrote ({super.key}).
I know, it looks like a typo, but it’s actually really important. That super.key creates a unique ID for every single widget you create. Think of it like a Social Security number or a serial number for a Lego brick.
Flutter uses that key to keep track of exactly which widget is which when it’s drawing them on your screen. And yes, pretty much every widget you ever build will have this super.key thing attached to it.
Take Your Flutter Skills to the Next Level
Build professional Flutter apps through structured lessons, practical projects, and a complete capstone.
⭐ Trusted by 500+ Flutter developers.

Step 8: The build Method
Alright, right below that super.key line, we’re going to add the actual “instructions” for our widget.
@override
Widget build(BuildContext context) {
  return MaterialApp();
}
Code language: CSS (css)
It looks a bit scary, I know. But it’s actually very simple.
See that @override? It’s just us telling Flutter, “Hey, I know you already have a default way of building widgets, but I want to use my version instead.”
Then we have the build method. Think of this as the “factory” of your widget. Its entire job is to return something to the screen. Most of the time, it returns a MaterialApp, a Scaffold, or some other Lego piece.
In this case, we are returning the MaterialApp(). This is the “Master Widget” that holds your entire app together. It sets up the theme, the title, and the navigation. Inside this widget is where everything else in your app gets built.
Step 9: The Contents of the MaterialApp
Alright, now we’re getting into the good stuff. Let’s actually put some instructions inside our MaterialApp() widget:
return MaterialApp(
  title: 'Hello World Toggle App',
  debugShowCheckedModeBanner: false,
);
Code language: JavaScript (javascript)
First, let’s talk about the title. This isn’t the text that shows up on the screen of your app. Instead, it’s the name that shows up above your app when you hit the “Recent Apps” or “Task Switcher” button on your phone.
Next, you see we set debugShowCheckedModeBanner: false. By default, Flutter puts a little red “Debug” banner in the top-right corner of your app to remind you that you’re still in development mode.
Setting this to false hides that banner so our app looks clean and neat from the start.
Step 10: Setting the Theme with ThemeData
Next, we need to set the “vibe” for our app. Usually, that involves light mode, dark mode, and custom fonts, but we don’t need to worry about all that yet.
For now, we’re going to use the Material 3 design system—it’s Google’s latest and greatest look for Android. Add this code right below the debugShowCheckedModeBanner line:
theme: ThemeData(
  useMaterial3: true,
  colorScheme: ColorScheme.fromSeed(seedColor: Colors.amber),
),
Code language: CSS (css)
Here’s what’s happening: We call theme: and assign it a ThemeData() object. Think of ThemeData as a giant style sheet that already has colors and spacing figured out. We’re just tweaking a few settings.
First, we set useMaterial3: true. This tells Flutter, “Hey, use the newest Android 14+ styles.”
Then, look at the colorScheme. We’re using something called fromSeed. This is like magic—you give Flutter one “Seed Color” (I used amber, but you can use blue, green, or whatever you like), and Flutter automatically generates a whole palette of matching shades for your buttons, backgrounds, and text.
That’s all you need to make your app look professional right out of the gate.
Step 11: The home Property
Now it’s time to tell our app which screen to show first. Inside your MaterialApp, right below the theme section, add this line:
home: const HomeScreen(),
Code language: JavaScript (javascript)
And that, my friends, completes our StatelessWidget shell.
But wait—you’ll notice a red squiggly line under HomeScreen(). That’s because the computer is looking for that widget and can’t find it yet. We need to build it! But this time, we aren’t making it a “Stateless” widget. We are making it a StatefulWidget.
Why? Because this is the screen that’s actually going to do something. It’s going to hold the data that changes when we click our button.
Step 12: The StatefulWidget
Go ahead and move outside the curly braces of your MyApp class. Right below it, let’s start our new widget:
class HomeScreen extends StatefulWidget {
  const HomeScreen({super.key});

  @override
  State<HomeScreen> createState() => _HomeScreenState();
}
Code language: JavaScript (javascript)
We’re doing the same thing as before by “extending” a widget from our Lego box—this time the StatefulWidget. We also added our super.key because, as we learned, every widget needs its ID.
But look closely at the createState line. This is where it gets interesting.
A Stateful Widget is actually split into two parts:
- The Widget: (HomeScreen) – This is the part Flutter sees.
- The State: (_HomeScreenState) – This is the “brain” that remembers what’s happening in the app.
See that underscore (_) before _HomeScreenState? In the world of coding, that underscore is a secret signal. It means this function is private. It belongs only to this file and nothing else can mess with it.
Right now, your code is still showing an error because we’ve told Flutter the “brain” exists, but we haven’t actually built it yet. Let’s fix that in the next step!
Step 13: The Private _HomeScreenState
Now we need to build that _HomeScreenState we mentioned in the previous step. This is the “brain” where the visual magic actually happens.
Right below your StatefulWidget, add this:
class _HomeScreenState extends State<HomeScreen> {
  @override
  Widget build(BuildContext context) {
    return Scaffold();
  }
}
Code language: JavaScript (javascript)
What are we doing here? Again, we’re extending, but this time we’re extending the State and telling it that it specifically belongs to our HomeScreen.
Inside, we have our familiar @override and build method, but look closely: this time we are returning a Scaffold().
Think of the Scaffold as a blank piece of paper. It’s the basic layout structure for any screen in an Android app. It’s what holds the top bar, the background, and the buttons.
Time to Run the App!
If you’ve done everything right, you should now be able to run your app and see… a blank screen.
Wait, a blank screen? Yup. We’ve built the foundation, but we haven’t drawn anything on the paper yet. But getting to this blank screen is a huge milestone!
- Launch your Emulator: Open Android Studio and start your virtual device. (If you’re stuck, check the Flutter Installation Guide).
- Select your Device: At the bottom right of VS Code, you should see something like
Medium Phone API 36(the version might vary). - Hit Play: In your
main.dartfile, look for the “Run” or “Debug” play button at the top right.
Give it a minute or two for the first build. Once it’s done, you’ll see your emulator switch from the Android home screen to a clean, white (or amber-tinted) blank screen.
You’re officially running a Flutter app! Ready for Step 14, where we actually put something on that screen?
Step 14: The AppBar Widget
It’s time to start adding those widgets we’ve been talking about! Material Design 3 has so many widgets it’s hard to name them all, so we’ll just learn them as we build.
Our first real UI piece is the AppBar. This is the bar at the top that holds the app name, logos, search icons, and more. For now, we’re keeping it simple with a title.
Inside your Scaffold(), add this:
return Scaffold(
  appBar: AppBar(
    title: const Text('The Hello Toggle'),
    backgroundColor: Theme.of(context).colorScheme.primary,
    foregroundColor: Theme.of(context).colorScheme.onPrimary,
  ),
);
Code language: JavaScript (javascript)
I know it looks like a lot of code just for a top bar, but it’s actually very simple when you break it down:
title: Inside the title, we added aconst Text(). TheText()widget does exactly what it says—it shows text on the screen.backgroundColor: This sets the color of the bar itself. We’re telling it to use the “Primary” color from that theme palette we created earlier.foregroundColor: This applies to the items on top of the bar, like our text. By usingonPrimary, Flutter automatically picks a color (usually white or black) that stands out perfectly against the background.
The Magic of Hot Reload
Now, here is the best part of Flutter. Go ahead and Save your file (Ctrl+S or Cmd+S).
You don’t need to stop and restart the app. Thanks to Hot Reload, your app should update instantly in the emulator, and you’ll see your brand-new AppBar appear!

Step 15: The Body of the App
Every app has a “Body,” which is where the main content lives. By default, the Body is an edge-to-edge display, meaning any widget you add will stick right to the corners of your screen. To avoid that “cramped” look, we use Padding.
Right below your appBar, let’s add the body:
body: Padding(
  padding: EdgeInsets.all(16),
  child: Column(
    children: [
      Text('Hello World!'),
    ],
  ),
),
Code language: JavaScript (javascript)
know I added a bunch of stuff at once, so let’s break down those layers:
- The
PaddingWidget: This is our “buffer” zone. We usedEdgeInsets.all(16), which tells Flutter to push everything inwards by 16 pixels from every side (top, bottom, left, and right). This keeps our app looking clean. - The
childproperty: Most widgets in Flutter can only hold one thing inside them. We call that the “child.” Our Padding widget’s child is a Column. - The
ColumnWidget: Why use a Column? Because while most widgets only take one child, a Column can take multiple children. This allows us to stack widgets on top of each other vertically. - The
childrenproperty: Inside the Column, we added a list (notice the square brackets[]) and put a simpleText('Hello World!')widget inside it.
Go ahead and Save your file. Check your emulator—you should see your “Hello World!” text sitting nicely in the top-left area, but with a little bit of breathing room away from the edges.

Hey hey! We actually see the text in our app. Awesome, right?
Step 16: The Alignment
Nice! We got the text on the screen, but right now it’s just hanging out in the top-left corner. We want it right in the middle.
To do this, we need to handle two directions: Vertical and Horizontal.
First, let’s fix the vertical (up and down) alignment using the Column’s own settings:
child: Column(
  mainAxisAlignment: MainAxisAlignment.center,
  children: [Text('Hello World!')],
),
Code language: CSS (css)
In a Column, the “Main Axis” is vertical. By setting mainAxisAlignment to center, we tell the Column to push its children to the middle of the screen from top to bottom.
But we still need to center it horizontally (left to right). For that, we use a widget called Center.
The Pro Tip: Refactoring
You don’t need to manually cut and paste your code to add a new widget. We can Refactor.
- Right-click on the word
Columnin your code. - Select Refactor (or press
Ctrl + .on Windows /Cmd + .on Mac). - Choose Wrap with Center.
Your code will automatically update to look like this:
body: Padding(
  padding: EdgeInsets.all(16),
  child: Center(
    child: Column(
      mainAxisAlignment: MainAxisAlignment.center,
      children: [Text('Hello World!')],
    ),
  ),
),
Code language: CSS (css)
Now, Save and check your app. You’ll see “Hello World!” perfectly centered on your screen.
Boom! It looks professional now.
Step 17: Styling the Text() Widget
Our “Hello World” is perfectly centered, but it’s looking a little small and plain. Let’s give it some personality.
In Flutter, we don’t use CSS files. Instead, every Text widget has a property called style. Update your code inside the children: [] list:
children: [
  Text(
    'Hello World!',
    style: TextStyle(
      fontSize: 40,
      fontWeight: FontWeight.w500,
      color: Colors.amber[900], // Optional: matching our theme!
    ),
  ),
],
Code language: JavaScript (javascript)
So, what’s happening here?
style: We added the style property to our Text widget.TextStyle(): This is the specialized “box” where all your typography settings live.fontSize: We bumped it up to 40 so it’s impossible to miss.fontWeight: We usedw500, which is basically “Medium” or “Semi-bold.” It gives the text more weight without making it look too chunky.
Save your work and check the emulator.
That looks much more like a real app, doesn’t it?
Step 18: The ElevatedButton() and SizedBox
Now that we have the text, it’s time to add the button that will eventually change that text. In Flutter, buttons aren’t just called “buttons”—they have different names based on their style.
The one we’re going to use is the ElevatedButton(). It has a nice shadow and looks like it’s slightly raised off the screen. Let’s add it right under our Text widget:
Text(
  'Hello World!',
  style: TextStyle(fontSize: 40, fontWeight: FontWeight.w500),
),

ElevatedButton(onPressed: () {}, child: Text('Change Text')),
Code language: JavaScript (javascript)
Here is what’s going on inside those parentheses:
onPressed: This is the most important part. It tells the app what to do when someone taps the button. For now, we set it to a “blank function”() {}, which means it does nothing yet. We’ll fix that soon!child: Just like our other widgets, the button needs a child to show what’s inside it. We added a simpleTextwidget that says “Change Text.”
The SizedBox Widget
If you check your emulator now, you’ll see the text and the button are practically touching. It looks a bit cramped. We need some “breathing room” between them.
For that, we use the SizedBox widget.
Text(
  'Hello World!',
  style: TextStyle(fontSize: 40, fontWeight: FontWeight.w500),
),
SizedBox(height: 12), // The invisible spacer!
ElevatedButton(onPressed: () {}, child: Text('Change Text')),
Code language: PHP (php)
Think of a SizedBox as exactly what it sounds like: a box with a specific size. But since we didn’t put anything inside it, it’s just an empty, invisible box. By setting the height to 12, we are essentially pushing the button 12 pixels down away from the text.
Save your work! Your emulator should now show a nicely spaced-out layout with your styled text and your clickable button.

Step 19: The Logic (The App’s Brain)
Alright, our app looks great, but it doesn’t do anything yet. We need to add the logic.
Here’s the plan: We want the screen to change when we tap the button. To do that, we’ll create a “Switch” (a Boolean) that is either True or False.
1. Create the Variable
First, go to the top of your _HomeScreenState class (right before the build method) and add this:
class _HomeScreenState extends State<HomeScreen> {
  bool _isHello = true; // This is our "Switch"
Code language: JavaScript (javascript)
2. Create the “Toggle” Function
Now, we need a way to flip that switch. Right below the variable, add this function:
void _toggleHello() {
  setState(() {
    _isHello = !_isHello;
  });
}
Code language: JavaScript (javascript)
Here is what’s happening in those three lines:
_toggleHello(): This is our private function (remember the underscore!).setState(): This is the most important command in Flutter. It tells the app, “Hey! Something changed! Re-draw the screen right now!” WithoutsetState, your variable would change, but the screen would stay the same._isHello = !_isHello: The exclamation mark (!) means “the opposite.” So if it’s true, make it false. If it’s false, make it true. It’s a simple toggle.
3. Optimizing with const
Because setState rebuilt the screen, we want to make sure Flutter doesn’t work harder than it has to. Anything that never changes (like our spacer) should have the const keyword. This keeps your app lightning-fast.
const SizedBox(height: 12),Code language: JavaScript (javascript)Step 20: Applying the Logic
Now, we need to connect our “Brain” (the logic) to our “Body” (the widgets). We’re going to use a Ternary Operator. Think of this as a quick “If/Else” shortcut.
Update your children: [] list inside the Column like this:
children: [
  Text(
    _isHello ? 'Hello World!' : 'Bye World!',
    style: TextStyle(fontSize: 40, fontWeight: FontWeight.w500),
  ),

  const SizedBox(height: 12),

  ElevatedButton(
    onPressed: _toggleHello, // We connect our function here!
    child: Text(_isHello ? 'Change Text' : 'Change Back'),
  ),
],
Code language: JavaScript (javascript)
What’s happening here?
- The Text: We are telling Flutter: “Look at
_isHello. Is it true? (?) Then show ‘Hello World!’. Otherwise (:) show ‘Bye World!’.” - The Button Label: We do the exact same thing. If the switch is true, the button says “Change Text.” If it’s false, it says “Change Back.”
- The
onPressed: We linked our_toggleHellofunction directly to the button. Now, every time you tap it, Flutter flips that Boolean switch and runssetState()to refresh the screen.
Step 21: Changing the App Theme
Now, let’s say you want to change the vibe of your app. Maybe blue isn’t doing it for you, and you want something more energetic, like Orange or Red.
Because we set up our app using a “Seed Color” earlier, this is incredibly easy. Head back up to the top of your code where we defined the MaterialApp().
Find the ThemeData section and swap out Colors.blue for Colors.orange:
theme: ThemeData(
  useMaterial3: true,
  colorScheme: ColorScheme.fromSeed(seedColor: Colors.orange),
),
home: const HomeScreen(),
Code language: JavaScript (javascript)
Now, check your emulator. You’ll see that you didn’t just change the color of the top bar—Flutter automatically updated the button color, the text highlights, and even the subtle background tints to match that orange “seed.”
This is the beauty of Structured Minimalism. You define the rules once, and Flutter handles the rest.


The Grand Finale
Go ahead and Save your file one last time.
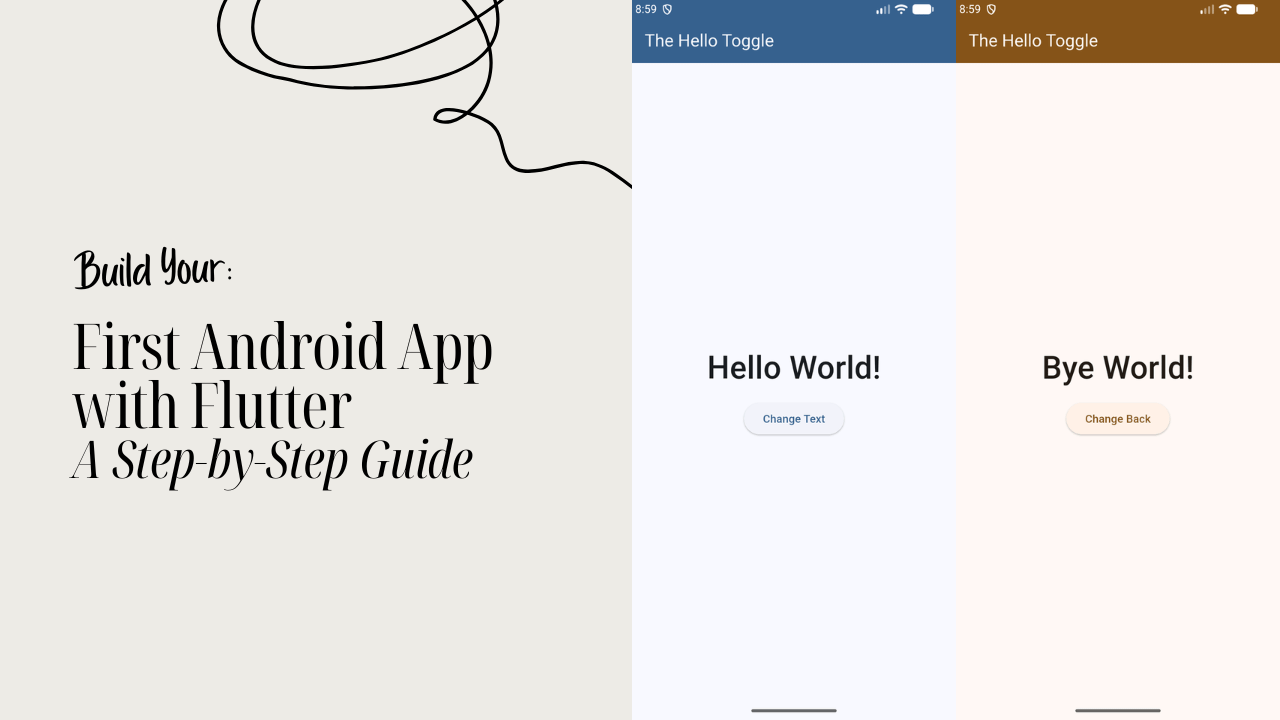
Now, look at your emulator. Tap that button. You should see the text jump between “Hello World!” and “Bye World!” instantly.
Congratulations! You didn’t just copy-paste code; you built a functional app from a blank screen. You handled the “Big Two” (Stateless and Stateful widgets), mastered state management with setState, and styled a modern Material 3 design.
You’re officially a Flutter developer. Welcome to the journey!
Want to explore the complete implementation?
I’ve made the full source code for this project available on GitHub so you can inspect the code, experiment with it, and build on top of it yourself.
🔗 GitHub Repository:
https://github.com/TheFlutterSensei/The-Hello-World-Toggle-App
Feel free to clone the project, modify it, and use it as a reference while learning Flutter. If you find it useful, consider starring the repository to support future FlutterSense projects.
Ready to Build Professional Flutter Apps?
Turn today’s knowledge into real-world Flutter skills with Flutter Foundations.
⭐ Trusted by 500+ Flutter developers.