Welcome! Let’s Build Something Awesome Together. Have you ever wondered how apps remember things?
Think about your favorite social media app. When you tap the “Like” button, the heart turns red, and the like count instantly goes up by one. When you add an item to a shopping cart, the cart icon immediately updates to show your total.
How does the app know that something changed, and how does it update the screen so quickly?
The secret ingredient behind all of this is called State.
If you are new to Flutter, the word “State” might sound a bit technical or intimidating. But don’t worry! In this guide, we are going to break it down together step-by-step.
Instead of just reading boring theories, we are going to build a practical Counter App from scratch.
By the time you finish this short guide, you won’t just understand how state works—you will have built a working app that can increase, decrease, and reset numbers at the tap of a button.
Ready to build your first dynamic Flutter app? Let’s get started!
Build Your First Android App with Agentic AI
Claim your free invite to our 1st Android App class and learn how to build real-world mobile Apps using modern AI tools.
What is State in Flutter?
Before we look at any code, let’s answer a simple question: What exactly is “State”?
In plain English, State is the information that your app remembers at any given moment. Think of your app like a person.
Right now, you might be happy, sitting down, and drinking a cup of coffee. If you stand up, your position changes. If you finish your coffee, your cup becomes empty.
Your current mood, your position, and how much coffee you have left are all pieces of your current “state.”
In a mobile app, it works exactly the same way. State is everything that can change while someone is using your app.
Here are a few quick examples you see every day:
- A checkbox: Is it checked (True) or unchecked (False)?
- A login screen: Is the user logged in, or are they still typing their password?
- A shopping cart: How many items are inside right now?
In Flutter, the user interface (the UI) is built directly from this state. When the state changes, the screen updates to reflect the new information. It’s that simple!
Why Do We Need State Management?
Let’s tackle Why Do We Need State Management? by showing them the “problem” it solves, keeping the tone helpful and relatable.
Why Do We Need State Management?
Now that we know what state is, you might wonder: Why do we need a system to manage it? Can’t we just change a variable and call it a day?
To understand why we need state management, let’s look at how Flutter actually draws things on your screen.
Flutter is incredibly fast because it builds your user interface (UI) like a blueprint based on your data. But here is the catch: once Flutter draws a widget on the screen, that widget is immutable—which is just a fancy way of saying it cannot change itself.
Imagine you write a number on a piece of paper with a permanent marker. If you want to change that number from 0 to 1, you can’t just rewrite it on top.
It will look like a messy blob! Instead, you have to crumple up that piece of paper, throw it away, and write 1 on a brand-new sheet.
This is exactly why we need State Management. It acts as the manager of your app that:
- Watches for changes: It notices the exact moment a user taps a button or types some text.
- Updates the data: It changes the variable behind the scenes (like turning a
0into a1). - Tells Flutter to redraw: It politely tells Flutter, “Hey, the data changed! Please throw away the old screen and quickly redraw a fresh one with the new numbers.”
Without state management, your app’s data might change in the background, but the screen would stay completely frozen. State management is the bridge that keeps your data and your user interface perfectly in sync.
Understanding the Counter App
Before we open our code editor and start building, let’s take a quick look at exactly what we are going to create.
We are going to build an interactive Counter Application. While a counter might look simple on the surface, it is actually the perfect project to learn state management because it uses the exact same core logic that powers massive apps like Instagram, Uber, or Amazon.
Here is how our app will work when we are done:
- The Display: Right in the center of the screen, there will be a large number showing the current count. It will start at
0. - The Action Buttons: Instead of just one button, our app will have three distinct actions:
- Increment (+): Tapping this will add
1to our counter. - Decrement (-): Tapping this will subtract
1from our counter. - Reset (🔄): Tapping this will instantly bring our counter back to
0.
- Increment (+): Tapping this will add
By focusing on these three simple operations, you will see exactly how data moves around in Flutter, how buttons trigger changes, and how the screen updates dynamically.
Now that we have the blueprint in our minds, let’s move on to the fun part: creating the project!
Creating the Project
Let’s roll up our sleeves and create our brand-new Flutter project! We want a clean slate so we can build our counter logic from scratch.
Follow these simple steps to get your project ready:
Step 1: Open Your Terminal or Command Prompt
Open the terminal app on your computer. Navigate to the folder where you like to keep your development projects (for example, your Desktop or Projects folder) by using the cd command:
cd DesktopStep 2: Run the Flutter Create Command
Type the following command to create a fresh project named simple_counter. Press Enter:
flutter create simple_counterFlutter will work its magic for a few seconds and set up all the folders and files we need for an Android and iOS application.
Step 3: Open the Project in Your Editor
Navigate into your new project folder:
cd simple_counterNow, open this folder in your favorite code editor (like VS Code or Android Studio). If you are using VS Code, you can open it directly from the terminal by typing:
code .Step 4: Clean Up main.dart
When you open the project, look at the folder structure on the left side. Go to the lib folder and open the main.dart file.
Flutter automatically generates a lot of template code and comments here. To make sure we understand every single line of our app, let’s select everything inside main.dart (Ctrl+A or Cmd+A) and delete it completely.
Leave the file totally blank for now. In the next section, we will start building our user interface line by line!
Building the User Interface
Now that we have a blank main.dart file, let’s build the visual structure of our app. We want a beautiful, clean layout with our text display in the middle and our three action buttons arranged neatly at the bottom.
Step 1: The App Entry Point (main)
Every single Flutter app begins at a function called main(). Think of this as the engine starter for your application.
Open your blank main.dart file and add these first few lines:
import 'package:flutter/material.dart';

void main() {
  runApp(const MyApp());
}
Code language: JavaScript (javascript)
Let’s break down exactly what is happening here:
import '...';: This brings in Flutter’s built-in design toolkit (called Material Design). It gives us access to pre-made visual blocks like buttons, text, and colors.void main(): This is the starting gun. When your Android phone launches the app, it looks for this exact name first.runApp(): This is a built-in Flutter function that says, “Hey, take my root widget and display it on the screen.”const MyApp(): This is the name of our main app container. Right now, your code editor might show a red underline here—that’s completely normal because we haven’t builtMyAppyet!
Step 2: Creating the Root Widget (MyApp)
Now, let’s fix that red underline by creating our main app container, MyApp.
Add this code directly below your main() function:
class MyApp extends StatelessWidget {
  const MyApp({super.key});

  @override
  Widget build(BuildContext context) {
    return const MaterialApp();
  }
}
Code language: JavaScript (javascript)
Let’s break down what this does:
StatelessWidget: In Flutter, almost everything is a “Widget” (a visual building block). AStatelessWidgetis a static frame. It sets up the basic structure of our app but doesn’t change its own data over time.@override Widget build(...): This is a configuration window where you describe what your widget should look like. It returns a widget layout to Flutter so it can be drawn on the phone screen.MaterialApp: This is a powerful wrapper widget. It acts as the backbone of our application, setting up the underlying design theme, core fonts, and navigation setup for our Android application.
Step 3: Configuring the MaterialApp
Now, let’s look inside that MaterialApp widget and configure it. Instead of leaving it blank, we will add some properties to give our app a beautiful theme and point it to our main screen.
Update your MaterialApp inside the build method so it looks like this:
return MaterialApp(
  title: 'Simple Counter',
  debugShowCheckedModeBanner: false,
  theme: ThemeData(
    useMaterial3: true,
    colorSchemeSeed: Colors.blue,
    brightness: Brightness.light,
  ),
  home: const HomeScreen(),
);
Code language: JavaScript (javascript)
Let’s see what each of these settings does:
title: This is the internal name of your application that the phone’s operating system uses (for example, when you switch between running apps).debugShowCheckedModeBanner: false: This simply hides the small red “Debug” banner from the top corner of your screen, keeping your application looking clean and professional.theme: ThemeData(...): This is where we control the looks of our app.useMaterial3: trueenables Google’s latest, modern design system.colorSchemeSeed: Colors.bluesets up a beautiful, consistent blue palette for our buttons and bars.brightness: Brightness.lightensures our app starts in light mode.
home: const HomeScreen(): This tells Flutter exactly which screen to open first. Don’t worry if your code editor shows a red underline underHomeScreen—we are going to build that screen together in the next step!
Step 4: Introducing the StatefulWidget (HomeScreen)
Now, let’s fix that red underline by building our HomeScreen. This time, we are using a StatefulWidget instead of a StatelessWidget because this screen needs to remember and update data (our counter number) dynamically.
Add this code at the bottom of your main.dart file:
class HomeScreen extends StatefulWidget {
  const HomeScreen({super.key});

  @override
  State<HomeScreen> createState() => _HomeScreenState();
}

class _HomeScreenState extends State<HomeScreen> {
  @override
  Widget build(BuildContext context) {
    return Scaffold();
  }
}
Code language: JavaScript (javascript)
Let’s break down this new structure:
StatefulWidget: This is a special type of widget that can track changes while the app is running. It is split into two parts: the widget itself (HomeScreen) and its companion state class (_HomeScreenState).createState(): This tells Flutter to create a separate space in the phone’s memory to keep track of this screen’s changing data._HomeScreenState: This is where the magic happens! Any variables, custom logic, or button actions we create will live inside this class.Scaffold(): Inside thebuildmethod, we return a blankScaffold. This gives us a fresh white canvas to start adding our layout elements, like top bars and buttons.
Step 5: Setting Up the Screen Body
Now let’s replace our completely blank Scaffold with some initial layout pieces. We want to make sure our text is safe from overlapping with phone camera notches and has a bit of breathing room around the edges.
Update the build method inside your _HomeScreenState to look like this:
return Scaffold(
  body: SafeArea(
    child: Padding(
      padding: EdgeInsets.all(16),
      child: Text('Simple Counter'),
    ),
  ),
);
Code language: JavaScript (javascript)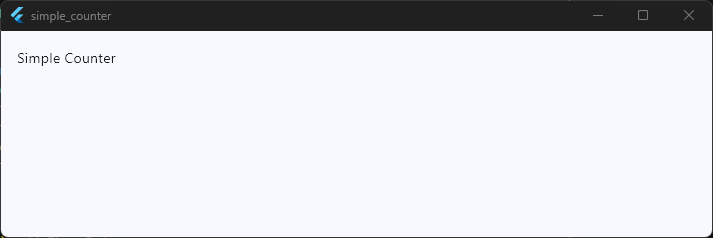
Step 6: Centering Content and Stacking Layouts
Instead of just showing a single line of text in the corner, we want our layout ready to hold multiple items stacked on top of each other. We will use a Center widget to position things perfectly, and a Column to stack our text and numbers vertically.
Update the child: of your Padding widget to look like this:
child: Padding(
  padding: EdgeInsets.all(16),
  child: Center(
    child: Column(
      children: [
        Text(
          'Your Counter:',
          style: TextStyle(fontSize: 16, fontWeight: FontWeight.bold),
        ),
      ],
    ),
  ),
),
Code language: JavaScript (javascript)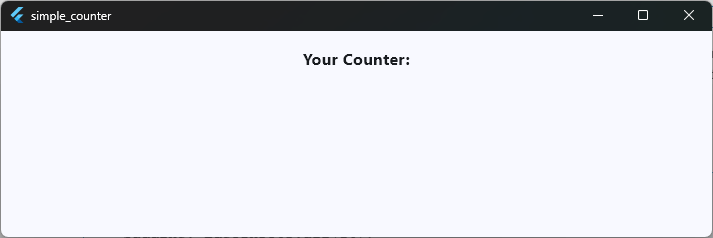
Let’s break down this structural layout change:
Center: This takes its child widget and perfectly anchors it right in the middle of the phone screen horizontally and vertically.Column: This is a powerful layout widget. It takes a list of multiple widgets inside itschildren: [...]block and stacks them vertically, one underneath the other.mainAxisAlignment: MainAxisAlignment.center: (Optional tip) Adding this inside your column tells Flutter to gather all the children and keep them tightly centered in the middle of the vertical axis.style: TextStyle(...): This lets us format our text. We increase thefontSizeto16so it’s easily readable and apply a bold weight to make it act as a clear section header.
Step 7: Adding the Counter Number Display
Now that our vertical stack (Column) is set up, let’s add the star of the show: the big number that will track our count. We will place it directly underneath our header text.
Update your children: [...] list inside the Column to look like this:
children: [
  Text(
    'Your Counter:',
    style: TextStyle(fontSize: 16, fontWeight: FontWeight.bold),
  ),
  Text(
    '0',
    style: TextStyle(
      fontSize: 80,
      color: Colors.blue,
      fontWeight: FontWeight.w100,
    ),
  ),
],
Code language: JavaScript (javascript)
Let’s look at the styling choices we made here:
- Vertical Stacking: Because this new
Textwidget sits inside thechildrenlist right after the “Your Counter:” text, Flutter automatically places it directly beneath it on the screen. fontSize: 80: We want this number to be huge and prominent, making it the clear centerpiece of the app interface.color: Colors.blue: This colors our number with the beautiful blue accent we defined earlier in our app theme.fontWeight: FontWeight.w100: Instead of making the huge number thick and bold, a weight ofw100gives it a sleek, thin, and ultra-modern look that balances perfectly with the large size.
Step 8: Adding the Action Buttons with Wrap
With our display in place, we need a clean way to arrange our interaction buttons below the number. We will use a SizedBox to add some space, and a Wrap widget to hold our three action buttons safely.
Update your children: [...] list inside the Column to include the buttons like this:
children: [
  Text(
    'Your Counter:',
    style: TextStyle(fontSize: 16, fontWeight: FontWeight.bold),
  ),
  Text(
    '0',
    style: TextStyle(
      fontSize: 80,
      color: Colors.blue,
      fontWeight: FontWeight.w100,
    ),
  ),
  SizedBox(height: 20),
  Wrap(
    children: [
      ElevatedButton.icon(
        onPressed: () {},
        icon: Icon(Icons.add),
        label: Text('Increment'),
      ),
      ElevatedButton.icon(
        onPressed: () {},
        icon: Icon(Icons.refresh),
        label: Text('Reset'),
      ),
      ElevatedButton.icon(
        onPressed: () {},
        icon: Icon(Icons.remove),
        label: Text('Decrement'),
      ),
    ],
  ),
],
Code language: JavaScript (javascript)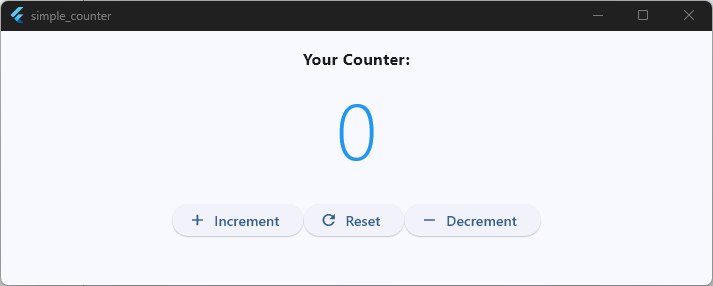
Let’s break down how this section organizes our layout:
SizedBox(height: 20): This acts like an invisible spacer block. It pushes the buttons down by 20 pixels so they aren’t uncomfortably crowded against our large number.Wrap: This is a smart layout widget similar to aRow. However, if the screen size is too small (or if the user changes their text size), aRowwould break and show a yellow-and-black pixel overflow warning. AWrapis smart—it automatically flows extra items down to a new line if it runs out of space!ElevatedButton.icon: This is a pre-styled Material Design button that conveniently pairs an icon (likeIcons.add,Icons.refresh, orIcons.remove) right next to a text label.onPressed: () {}: The execution blocks are empty for now. If you run the app, the buttons look gorgeous and clickable, but they won’t change the number yet.
Step 9: Adjusting Button Spacing for Breathing Room
To make our buttons look truly polished, we will configure the layout properties of our Wrap widget. By adding explicit horizontal and vertical gaps, we ensure our buttons remain cleanly separated and touch-friendly on any Android device screen.
Update your Wrap widget configuration to include these layout settings:
Wrap(
  runSpacing: 16,
  spacing: 16,
  children: [
    ElevatedButton.icon(
      onPressed: () {},
      icon: Icon(Icons.add),
      label: Text('Increment'),
    ),
    ElevatedButton.icon(
      onPressed: () {},
      icon: Icon(Icons.refresh),
      label: Text('Reset'),
    ),
    ElevatedButton.icon(
      onPressed: () {},
      icon: Icon(Icons.remove),
      label: Text('Decrement'),
    ),
  ],
),
Code language: JavaScript (javascript)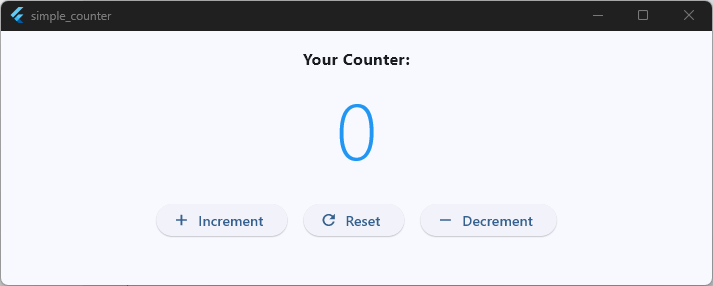
Let’s look at exactly how these spacing rules improve our interface:
spacing: 16: This controls the horizontal gap. It places exactly 16 pixels of empty space between the buttons when they sit side-by-side in a row.runSpacing: 16: This controls the vertical gap. If a user has a smaller phone screen or high accessibility text scaling turned on, the buttons will wrap onto a second line. This parameter ensures that the top and bottom rows won’t smash into each other, maintaining a clean layout.
Step 10: Performance Optimization with const
Before we make our application interactive, let’s apply some quick performance upgrades to our code. We will do this by using Flutter’s const keyword on widgets that never change.
Go back through your code and add the const keyword to your padding, static labels, spacers, and button configurations like this:
return Scaffold(
  body: SafeArea(
    child: Padding(
      padding: const EdgeInsets.all(16),
      child: Center(
        child: Column(
          children: [
            const Text(
              'Your Counter:',
              style: TextStyle(fontSize: 16, fontWeight: FontWeight.bold),
            ),
            Text(
              '0',
              style: TextStyle(
                fontSize: 80,
                color: Colors.blue,
                fontWeight: FontWeight.w100,
              ),
            ),
            const SizedBox(height: 20),
            Wrap(
              runSpacing: 16,
              spacing: 16,
              children: [
                ElevatedButton.icon(
                  onPressed: () {},
                  icon: const Icon(Icons.add),
                  label: const Text('Increment'),
                ),
                ElevatedButton.icon(
                  onPressed: () {},
                  icon: const Icon(Icons.refresh),
                  label: const Text('Reset'),
                ),
                ElevatedButton.icon(
                  onPressed: () {},
                  icon: const Icon(Icons.remove),
                  label: const Text('Decrement'),
                ),
              ],
            ),
          ],
        ),
      ),
    ),
  ),
);
Code language: JavaScript (javascript)
Let’s look at why this small change makes a big difference under the hood:
- What is
const?: It stands for constant. It explicitly tells Flutter, “This widget will look exactly the same from the moment the app opens until the user closes it.” - The Performance Win: When your app updates the screen to show a new counter number, Flutter has to redraw parts of the user interface. By marking static elements as
const, Flutter remembers them in memory and completely skips re-building them, keeping your app running at an ultra-smooth 60 or 120 FPS.
Crucial Detail: Notice that we did not add
constto our'0'text widget. That’s because that specific number display is dynamic and will soon change values when a user clicks our buttons!
UI Milestone Achieved! 🏆
You have successfully built the complete visual layout for your counter application. Your widgets are structured, beautifully spaced, and fully performance-optimized.
If you run your application right now, you will see a clean, modern interface sitting right on your screen. However, tapping those buttons won’t alter the display just yet. To make our interface come alive, we need to connect our user actions to actual, live data.
Stuck or Want to Build Live?
If you want to dive deeper, ask questions in real-time, and build alongside a community of developer students, join my free live class! Let’s accelerate your coding journey together.
Introducing State
Right now, our application looks great, but it is completely frozen. You can tap the buttons as much as you want, but the screen will stubbornly display 0.
To make our counter actually work, we need to introduce State. In mobile development, “state” is simply any data that can change over time while a user is interacting with your app.
Step 1: Declaring Our State Variable
The first step is to give our app a way to remember the current count. We do this by declaring a variable inside our state class, _HomeScreenState. This variable will live outside our build method so that its value persists.
Open your main.dart file, navigate down to your _HomeScreenState class, and add an integer variable named _counter right at the top:
class _HomeScreenState extends State<HomeScreen> {
  // Declare the state variable here
  int _counter = 0;
Code language: JavaScript (javascript)
int _counter = 0;: This creates a plain integer variable and sets its initial starting value to0.- The Underscore (
_): In Dart, putting an underscore in front of a variable name marks it as private. This means this specific variable can only be accessed and changed inside this file, protecting our data from accidental edits elsewhere.
Step 2: Displaying the Live Variable
Now that we have a variable holding our number, we need to stop using the hardcoded text string '0' and tell our Text widget to read directly from _counter.
Scroll down to your Column children and update the number display Text widget like this:
// Before: Text('0', ...)
Text(
  '$_counter', // Updated to look at our variable
Code language: JavaScript (javascript)'$_counter': By using the$symbol inside the quotes, we are telling Flutter to look at our_countervariable, grab its current value, and turn it into text on the screen.
Our variable is declared and wired straight into the user interface!
Why Changing the Variable Alone Doesn’t Work
Now that we have our _counter variable hooked up, a natural next step might be to try updating its value directly when a button is pressed. Let’s look at why this logical guess doesn’t actually work in Flutter.
Imagine we update our Increment button’s onPressed block to look like this:
ElevatedButton.icon(
  onPressed: () {
    _counter++;
    print(_counter);
  },
  icon: const Icon(Icons.add),
  label: const Text('Increment'),
),
Code language: PHP (php)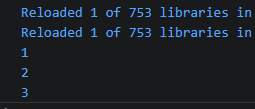
If you add that line, hot reload your app, and click the button, you will notice a strange behavior:
- In your development console, you will see the
print()statement outputting1,2,3,4perfectly. The variable is changing in the phone’s memory! - On your phone screen, the big blue number stubbornly remains
0.
Why is this happening?
Flutter is an incredibly fast framework because it only redraws things when it is explicitly told to.
When you change a variable like _counter++, you are quietly updating a value in the background memory. However, Flutter has no idea that the value changed. Because it doesn’t know, it never runs the build() method again. If the build() method doesn’t re-run, the user interface is never updated, and the old value stays frozen on the screen.
To fix this, we need a way to tell Flutter: “Hey, we just changed a piece of data. Please redraw the screen right now so the user can see it!”
Understanding setState()
To fix the frozen screen issue, we need to introduce one of the most fundamental tools in Flutter development: the setState() function.
setState() is a built-in method that is only available inside a StatefulWidget. It acts as an explicit trigger or an alarm system for the Flutter framework.
When you wrap code inside setState(), you are telling Flutter two things:
- “I am changing a variable that our user interface depends on right now.”
- “Please immediately re-run our
build()method to redraw the screen with the fresh data.”
How It Works Under the Hood
When a user taps a button and triggers setState(), Flutter executes the code inside its brackets instantly. Once that code finishes running, Flutter marks this specific widget as “dirty” (meaning it needs an update) and schedules a fast UI redraw.
The build() method executes again from top to bottom. When it reaches our Text('$_counter') widget, it reads the newly updated value from memory and draws the new number on the screen at a flawless 60 or 120 frames per second.
Without setState(), your app updates its memory quietly in the dark. With setState(), the user interface stays perfectly in sync with your data.
Implementing Increment
Now that we understand how setState() works, let’s put it to work! We will modify our Increment button’s onPressed property so that every time a user taps it, our counter variable increases by 1 and the screen updates instantly.
Find the first ElevatedButton.icon inside your Wrap widget and update its code to look like this:
ElevatedButton.icon(
  onPressed: () {
    // Wrap our variable update inside setState
    setState(() {
      _counter++;
    });
  },
  icon: const Icon(Icons.add),
  label: const Text('Increment'),
),
Code language: JavaScript (javascript)
What happens when you tap this button?
- The Trigger: The user taps the “Increment” button, running the
onPressedfunction. - The Update: Inside
setState(),_counter++fires, changing our value from0to1in the phone’s memory. - The Redraw: Because it’s wrapped in
setState(), Flutter immediately triggers thebuild()method. - The Result: The screen updates, and the user instantly sees the big blue number jump to
1.
Implementing Decrement
Now let’s configure our third button to do the exact opposite: decrease our counter value by 1 every time it is pressed.
Scroll down to the third ElevatedButton.icon inside your Wrap widget (the one with the Icons.remove icon) and update its code to look like this:
ElevatedButton.icon(
  onPressed: () {
    setState(() {
      _counter--;
    });
  },
  icon: const Icon(Icons.remove),
  label: const Text('Decrement'),
),
Code language: JavaScript (javascript)
Preventing Negative Numbers (Optional Refinement)
If you test your app right now and click Decrement repeatedly when the counter is at 0, the number will roll over into -1, -2, and so on. If you want this to be a strictly positive counter app, we can add a quick safety check using an if statement:
ElevatedButton.icon(
  onPressed: () {
    if (_counter > 0) {
      setState(() {
        _counter--;
      });
    }
  },
  icon: const Icon(Icons.remove),
  label: const Text('Decrement'),
),
Code language: JavaScript (javascript)
By wrapping the logic inside if (_counter > 0), the decrement operation will only execute if the current count is greater than zero. If the counter is 0, the button safely does nothing, keeping your app data reliable and predictable.
Implementing Reset
To finish up our control panel layout, we need to configure our middle button: the Reset button. This button will wipe the slate clean, resetting our counter back to its original starting value of 0 in a single tap.
Scroll to the middle ElevatedButton.icon inside your Wrap widget (the one with the Icons.refresh icon) and update its code to look like this:
ElevatedButton.icon(
  onPressed: () {
    setState(() {
      _counter = 0; // Set the variable back to zero
    });
  },
  icon: const Icon(Icons.refresh),
  label: const Text('Reset'),
),
Code language: JavaScript (javascript)
Breaking It Down
_counter = 0;: Instead of adding or subtracting, we use the assignment operator to directly force our variable back to its baseline value.setState(...): Just like before, wrapping this assignment insidesetState()tells Flutter to immediately wipe the old number off the screen and redraw the clean0.
Fantastic! All three of your action buttons are now completely interactive and operational.
Full Source Code
Here is the complete, production-ready code for your fully interactive counter application. You can replace the entire content of your lib/main.dart file with this code:
import 'package:flutter/material.dart';

void main() {
  runApp(const MyApp());
}

class MyApp extends StatelessWidget {
  const MyApp({super.key});

  @override
  Widget build(BuildContext context) {
    return MaterialApp(
      title: 'Simple Counter',
      debugShowCheckedModeBanner: false,
      theme: ThemeData(
        useMaterial3: true,
        colorSchemeSeed: Colors.blue,
        brightness: Brightness.light,
      ),
      home: const HomeScreen(),
    );
  }
}

class HomeScreen extends StatefulWidget {
  const HomeScreen({super.key});

  @override
  State<HomeScreen> createState() => _HomeScreenState();
}

class _HomeScreenState extends State<HomeScreen> {
  // Declare the state variable here
  int _counter = 0;

  @override
  Widget build(BuildContext context) {
    return Scaffold(
      body: SafeArea(
        child: Padding(
          padding: const EdgeInsets.all(16),
          child: Center(
            child: Column(
              children: [
                const Text(
                  'Your Counter:',
                  style: TextStyle(fontSize: 16, fontWeight: FontWeight.bold),
                ),
                // Before: Text('0', ...)
                Text(
                  '$_counter', // Updated to look at our variable
                  style: TextStyle(
                    fontSize: 80,
                    color: Colors.blue,
                    fontWeight: FontWeight.w100,
                  ),
                ),
                const SizedBox(height: 20),
                Wrap(
                  runSpacing: 16,
                  spacing: 16,
                  children: [
                    ElevatedButton.icon(
                      onPressed: () {
                        // Wrap our variable update inside setState
                        setState(() {
                          _counter++;
                        });
                      },
                      icon: const Icon(Icons.add),
                      label: const Text('Increment'),
                    ),
                    ElevatedButton.icon(
                      onPressed: () {
                        setState(() {
                          _counter = 0; // Set the variable back to zero
                        });
                      },
                      icon: const Icon(Icons.refresh),
                      label: const Text('Reset'),
                    ),
                    ElevatedButton.icon(
                      onPressed: () {
                        if (_counter > 0) {
                          setState(() {
                            _counter--;
                          });
                        }
                      },
                      icon: const Icon(Icons.remove),
                      label: const Text('Decrement'),
                    ),
                  ],
                ),
              ],
            ),
          ),
        ),
      ),
    );
  }
}
Code language: JavaScript (javascript)
📂 Grab the Complete Project on GitHub
Want to clone the entire project, explore the folder structure, or double-check your configuration? You can access the complete source code repository right on GitHub.
View Complete Source Code on GitHub
What We Learned
Congratulations on completing your very first interactive application! We covered some of the most critical foundational building blocks of Flutter development in this lesson.
Let’s do a quick recap of the core concepts you mastered today:
- Stateless vs. Stateful Widgets: You learned that while a
StatelessWidgetis perfect for static layouts that never alter, aStatefulWidgetis required whenever an app needs to remember data and dynamically redraw the screen. - The Concept of State: You learned that State is any live data in your app that can change over time while a user interacts with it (like our
_counterinteger variable). - Private Variables (
_): You discovered that prefixing a variable or class name with an underscore in Dart makes it private to that specific file, protecting your core logic from unintended edits. - The Power of
setState(): You mastered the application ofsetState(). You saw firsthand that changing a background memory variable isn’t enough—we must explicitly tell Flutter to trigger thebuild()method to repaint the UI with the fresh data. - Layout Spacing & Adaptability: You used
SizedBoxfor explicit gaps and configured a defensiveWrapwidget layout to automatically prevent ugly pixel overflow errors across different screen sizes.
What’s Next?
Now that you have built a fully functional, interactive application, you have officially taken your first big step into app development!
But don’t stop here—the best way to truly cement these skills is to take what you’ve learned and push it just a little bit further.
Challenges to Try on Your Own
To completely master State and user input, try modifying your project with these three upgrades:
- Change the Step Size: Modify the Increment and Decrement button logic so that the counter jumps by
5or10with every single tap instead of just1. - Add a Maximum Limit: Use an
ifstatement inside your increment logic to block the counter from exceeding a specific maximum limit (for example, stop it from counting past100). - Change Colors Dynamically: Can you make the text color of the counter turn Red if the number drops back down to
0, and turn Green if the number passes10?
Join Our Next Build Journey!
In our upcoming module, we are going to leave simple counters behind and step up to something much bigger: handling user text input, working with local asset images, and building a fully customized multi-screen application.